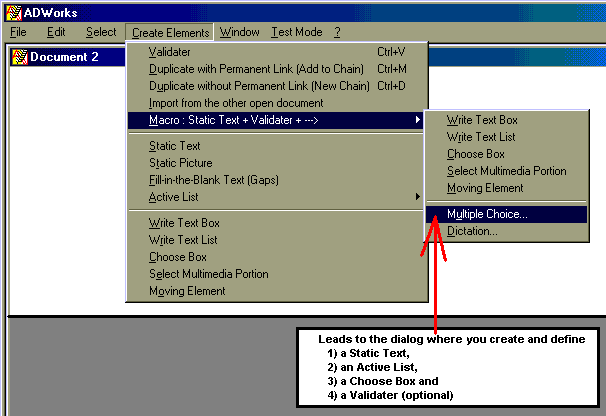
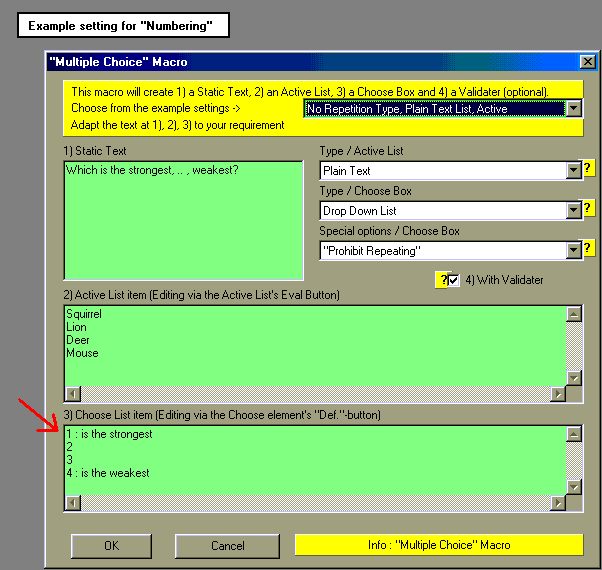
1) There is no Multiple Choice
Element as such. The menu Create Elements/ Macro
(See
illustration) leads to the dialog where you create and define 1) a
Static
Text, 2) an Active List, 3) a
Choose Box and 4) a Validater (optional). Theese elements
are automatically linked together for the validation.
As you see, the Multiple Choice Dialog does in one stroke some of the
steps that where detailed in Example 5. (Part of
example 5 are obviously of Multiple Choice-kind).
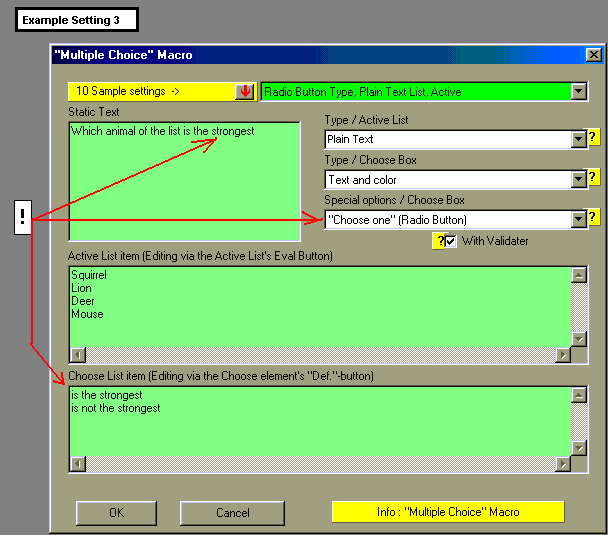
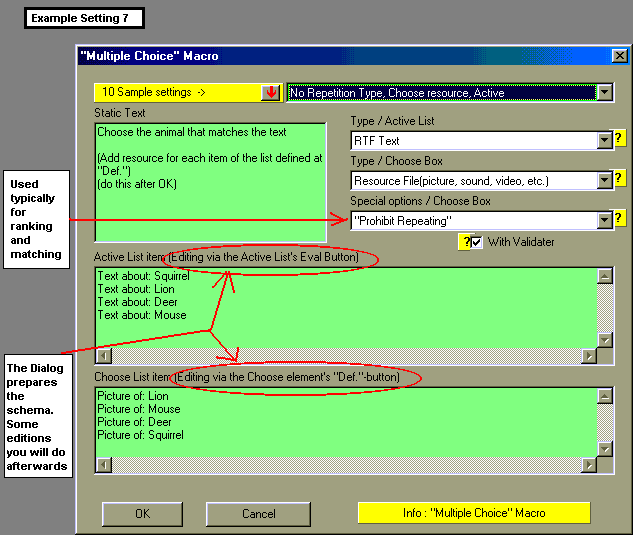
2) There are 3 types of Active
Lists. There are 6 main types of Choose Elements. There are 3 additional
Choose Element Special Options if the element is dependent on another element.
Therefore : there are more than 50 possibilities available in the Multiple
Choice dialog. The most eye-catching possibilities use multimedia. The
Multiple Choice Dialog allows the user to view the "top ten" possibilities
to easily see and understand the different available settings.In most
cases you will choose one of the 10 samples, modify the text and click
OK. Commented 1, screenshot
2, screenshot 3, screenshot
4, screenshot 5.
3) ADWorks intentionally abandons
the traditional Checkbox and Radio Button structure, thereby increasing
flexibility to create a wider variety of documents.
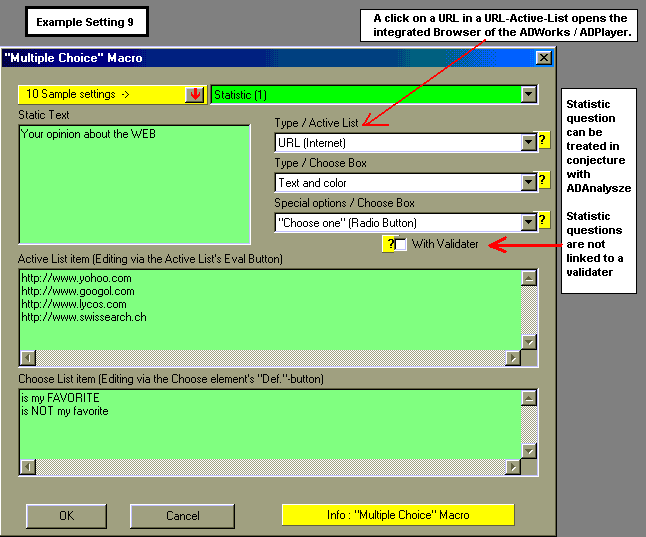
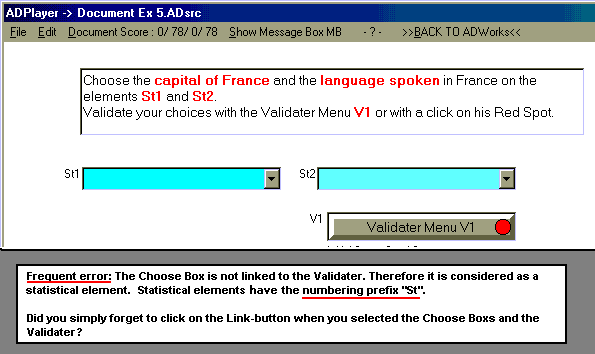
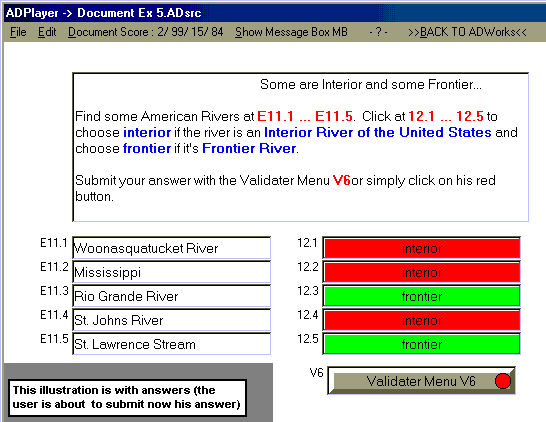
4) Statistical elements are Choose
Boxes that are not linked to a Validater and thus the elements are no longer
active. Statistical elements are useful when dealing with statistics. See
this screenshot
The choices made to a Statistical Element are saved in the Activity
File (See Schema of files
or see and refer to Exemple 1). These choices
do not need to be validated and the Evaluation Table of these elements
is ignored. The results of a statistical inquire can be analyzed using
the commands in ADAnalyze.
Statistical Choose Elements can be independently or dependently linked.
See
aspect of Statistic Element under ADPlayer.See
also.
Exemple 6
As example of Multiple Choise, lets say that we would like to have this - (Look at Illustration) - on the screen when using ADPlayer.
To obtain the result we do the following steps with ADWorks.
- Use the command New Source Document or open the document where you want to add the steps of the current example. This description will add the new elements to Document_Ex5.ADsrc and the modified document will be saved with the name Document_Ex6.ADsrc.
Remember: the Document_Ex5.ADsrc is the source file and the icon is represented by a "W". The Document_Ex5.ADcomp is the compiled file and the icon is represented by a "P". These documents are on the CD in the folder Sample/Try This/FolderEx5- Choose Multiple Choice... from the menu Create Element of ADWorks. This opens the Multiple Choice Dialog with the Example Setting 1 (Check Box Type, Plain Text, Active). See illustration. Fill the fields like this and leave the dialog with OK. It looks like this, immediately after result. Arrange position and size of the elements (See and refer basic Notions).
We want to test that group of the document (Look and refer to Exercise 1).Save the document with the command File/ Save or File/Save as. This will save a source file.
This test will make a temporary jump to ADPlayer (temporary = you need not to compile).
The source document looks like this under ADPlayer.
Choose, under ADPlayer, the good and/or bad answers to check out.
On the CD you find this example in the folder Sample/Try This/FolderEx6/
The files there are
- Document_Ex6.ADsrc (the source file; a "W" in the icon)Optional (note done on version CD:
- Document_Ex6.ADcomp (the compiled file; a "P" in the icon)