The explained steps make a group of AD elements. A document may contain several groups of AD elements.
We want to test that group of the document (currently the only
group) (Look how to do that test).
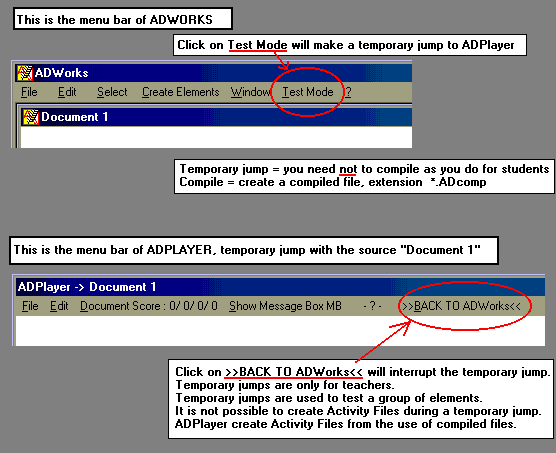
This test will make a temporary jump to ADPlayer (temporary
= you need not to compile).
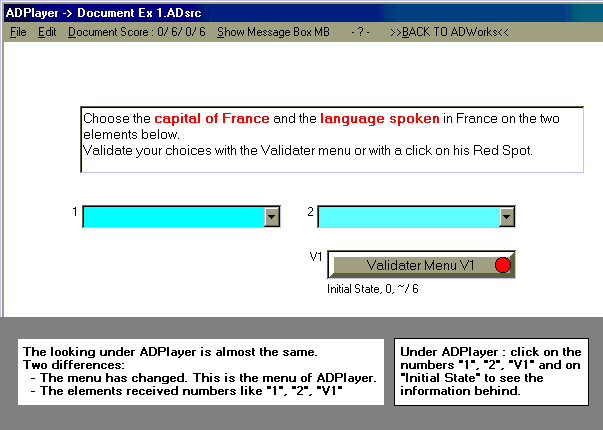
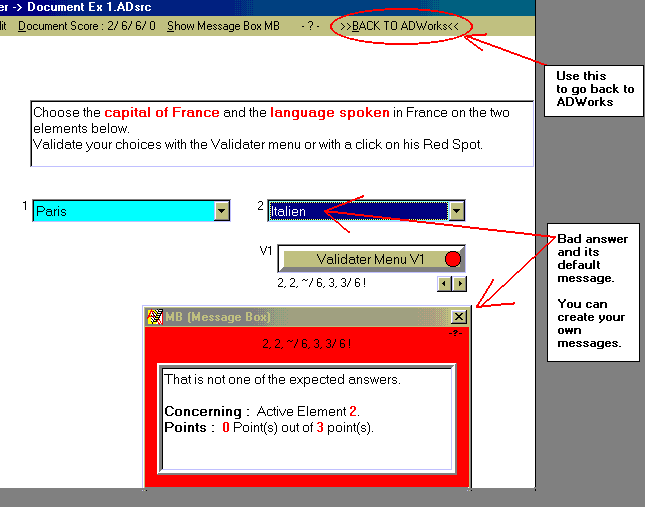
The source document looks like this
under ADPlayer.
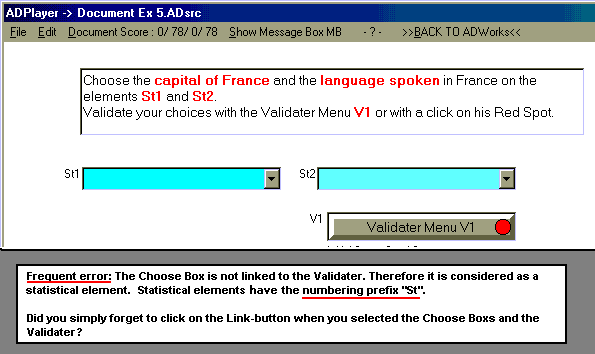
See some most frequent error that
may happen.
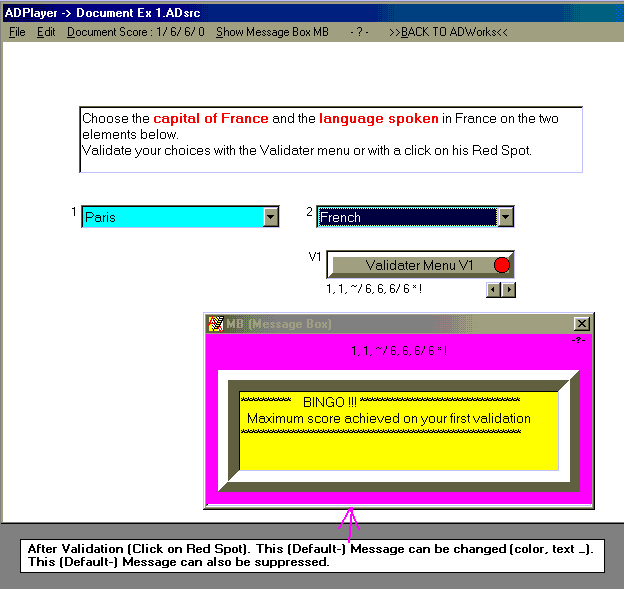
Choose, under ADPlayer, the good answers (Paris and French) to get
the
result of the test of that first group.
Try bad answers and check out the commands of the Validater Menu.
The appearing messages with this trials are the Default Messages. (Click
here for What are Messages?)
Go back to ADWorks (Look how to do this) and save the document with the command File/ Save or File/Save as. This will save a source file.
The student will only work with compiled file and ADPlayer. (See Schema of files)The command of File/ Create a compiled file of ADWorks is used to create a compiled file. (The command Create compiled file will come up with the warning The Summery of General Parameters is empty. The command File/General Parameters and the field Summery on the tab Compilation (see illustration) allow to fill this empty field.
Compiled files can't be changed anymore and the student can't look "What are the possibilities of the evaluation table".
Students save the answers, given when using a compiled file, in a Activity File.(See Schema of files)
Activity Files can be opened with ADPlayer to go on to give answers.
The answers in a Activity Files can analyzed with ADAnalyze (See about ADAnalyze).
On the CD you find this first example in the folder Sample/Try This/FolderEx1/
The files there are
- Document_Ex1.ADsrc (the source file; a "W" in the icon)
- Document_Ex1.ADcomp (the compiled file; a "P" in the icon)
Note, Choose Box are "cool":
When the writing of an item in the list of a Choose Box is changed, then the Evaluation Table is automatically adapted. Try it out.
In item in the list cannot be removed as long as it is used in some Evaluation Table.
Used items are marked with "!" in the column "D" in the list on the tab List of the Definition Dialog (click Def.).
Use the column "D" to change the order of the items.