To obtain the result we do the following steps with ADWorks.
- Use the command New Source Document or open the document where you want to add the steps of the current example. This description will add the new elements to Document_Ex7.ADsrc and the modified document will be saved with the name Document_Ex8.ADsrc. It can be found on the CD in the folder Sample/Try This/FolderEx8/
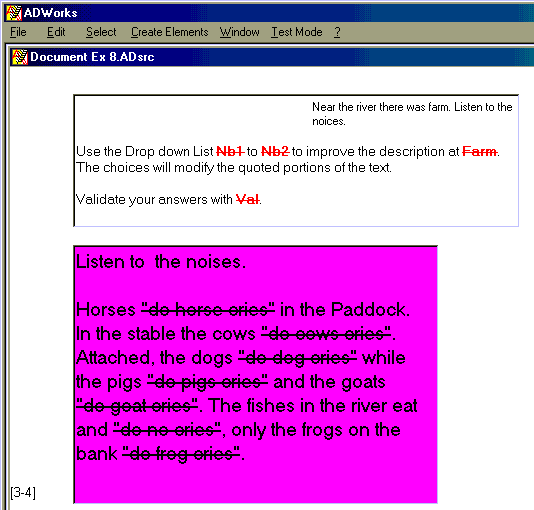
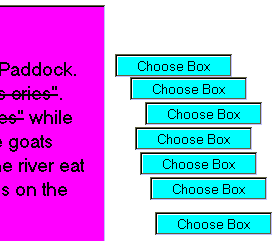
- Use Static Text from the menu Create Elements of ADWorks
and use the Def. button
to get upper part
of this illustration.
- Use Fill-in-the-Blank Text (Gaps) from the menu Create
Elements of ADWorks and use the Def. button
to
get the lower part of this illustration.
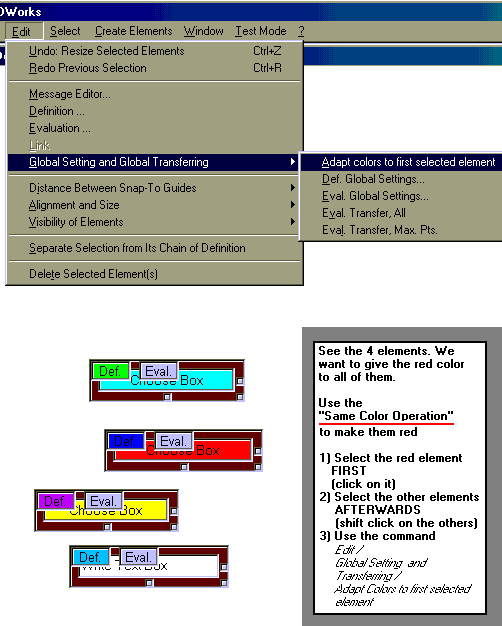
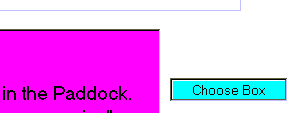
- Use Choose Box from the menu Create Elements.
- Optional step: Do the "Same
Color Operation" for the created
Choose Box. See
Result.
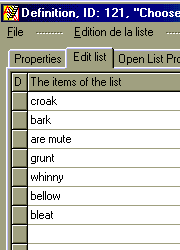
- Use his Def. button to define his list like
this on the List Tab.
- Use now 6 times Duplication with permanent Link from menu
Create
Elements. See Result.
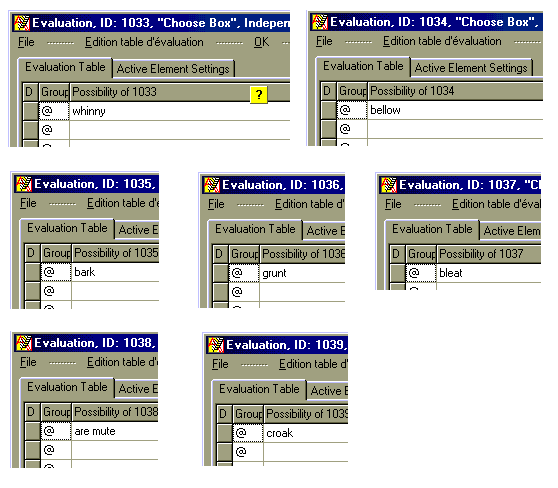
- Use the Eval. button of each Choose Box and fill the Evaluation
Table like this (1 illustation for 7 steps).
- Create a Validater with the menu Create Elements and
link the seven Choose Boxes to that Validater. (Select the
eight elements and click Link on the Validater). Note: if you would
like the user to submit one by one then we would create one Validater for
each Choose Box.
Let's do the references now- Click Eval. button of the Static Text and associate like this.
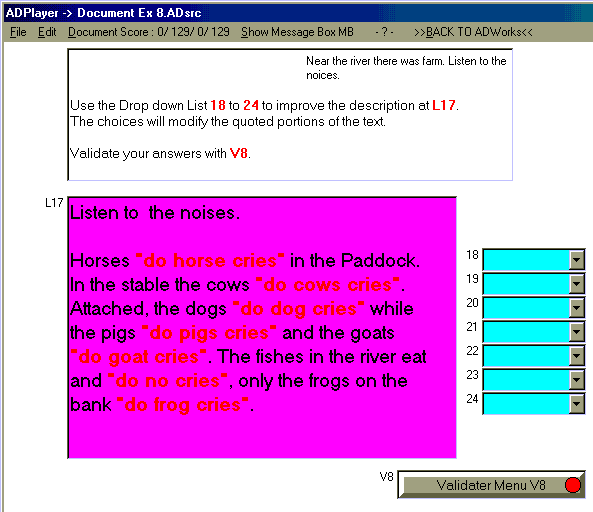
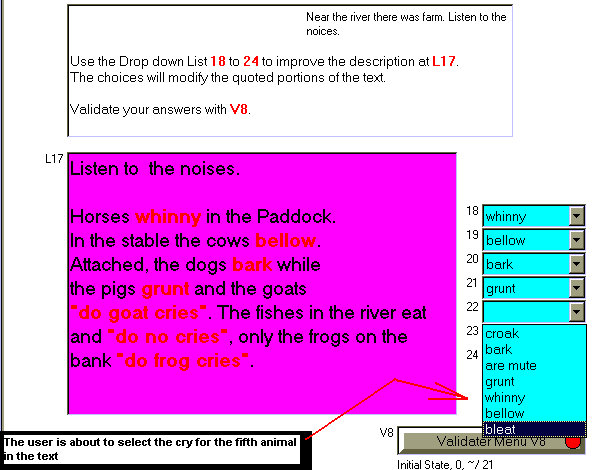
We are ready for a temporary jump to ADPlayer to test the new group. It looks like illustration 1 and illustration 2.
On the CD you find this example in the folder Sample/Try This/FolderEx8/
The files there are
- Document_Ex8.ADsrc (the source file; a "W" in the icon)A slight modification. The following result ( illustration 1, illustration 2 ) is obtained by one simpel modification: Use Eval. of the Fill-in-Blank Text and change to type 2, which is Element in situ. More about, see and refer Exercice 6, the 9 types of Fill-in-Blank Text
- Document_Ex8.ADcomp (the compiled file; a "P" in the icon)These steps present also a version
- Document_Ex8 bis.ADsrc (the source file; a "W" in the icon)in Sample/Try This/FolderEx8/ on the CD
- Document_Ex8 bis.ADcomp (the compiled file; a "P" in the icon)